4 min to read
Basic Tutorials Part 2
Basic Tutorials Part 2.

Git
A version control system (or VCS) provides an automatic way to track changes in software projects, giving creators the power to view previous versions of files and directories, develop speculative features without disrupting the main development, securely back up the project and its history, and collaborate easily and conveniently with others.
Command Line
The most common way of using git is via the Command Line interface. We will demonstrate this because we are geeks! (Er, it’s needed when you’re working remotely)
- To check if git is installed, type git into your terminal. If it returns any output, you’re good.
- If not, Download for Windows Here
- For OS X Here
- For Ubuntu:
sudo apt-get update
sudo apt-get install git
- Next there are a few One time steps that you need to follow
- Configure your name and email
$ git config --global user.name "Your Name"
$ git config --global user.email your.email@example.com
- Create a ‘repository’ for your code:
Repository is a fancy term for a Directory.
git config
To configure git
git help
To get help
mkdir MyProj
git init
If you get something like
Initialized empty Git repository in /Users/name/MyProj/.git/
You’re good.
- Commit:
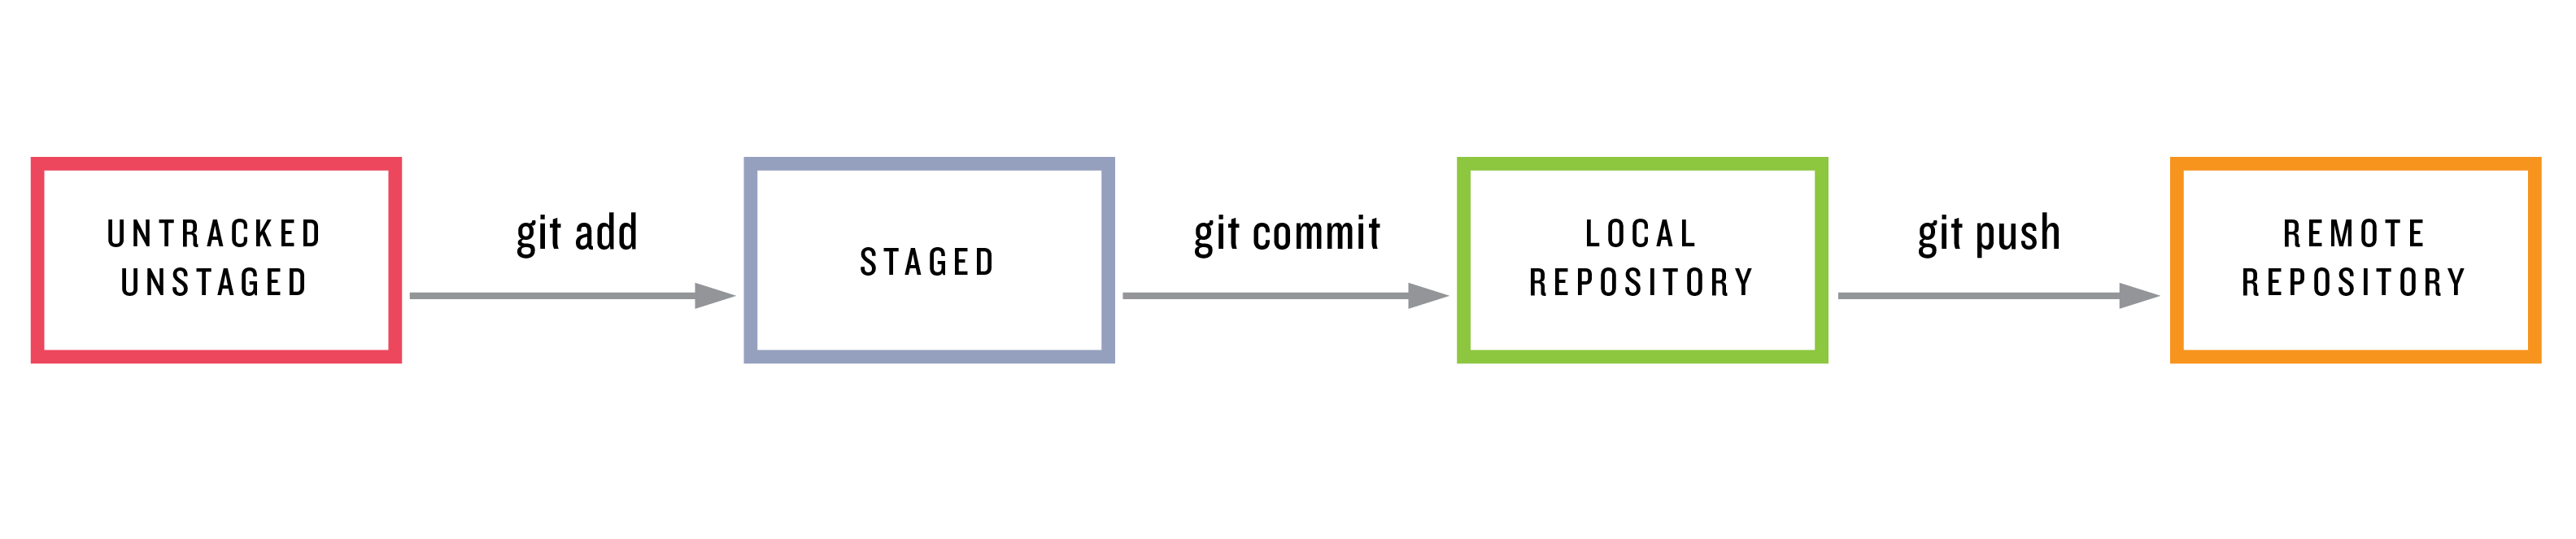
Git Works as shown: Unstage refers to making the file ‘staged’ from being untracked (In English, the file is added to our repository in the eyes of Git)
Untracked: Changes are not tracked Unstaged: These aren’t a part of Git’s repository.
git status
Returns the status of the Repository
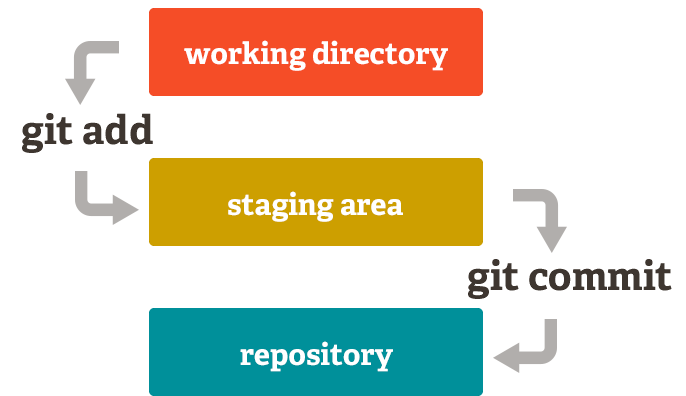
git add -FileName
This adds the File FileName to the staged area
git add .
Adds everything in our repository to git
Commit: When you make changes in a repo, these need to be commited. By design, Git requires every commit to include a commit message describing the purpose of the commit. Typically, this takes the form of a single line, usually limited to around 72 characters, with an optional longer message if desired
git log
To see a record of your commits
git commit -m
Commit staged changes with a message
When you have made changes in your repository, that have not been commited yet.
git diff
This shows the differences between the previous commit and the current one. (For all you Linux geeks, it runs the diff command in the background)
Terminologies and other commands:
-
Revert: In some cases you might want to revert a commit you just made. Consider this an undo button.
-
Clone When you clone a repo, you make a copy of it, into your GitHub account
-
Pull request:
When someone wants to submit changes to your repository, they submit a pull request. You review these changes and then ‘Merge’ the request into your repo.
- Collaborators:
Well, generally speaking, your Repository will be available for anyone to view once you put it on GitHub. But Collaborators are people that have direct access to the repo. Consider them the administrators.
- Branches:
Different collaborators work on the code simultaneously. To avoid hinderence, everyone works on a branch. A branch is the copy made of the code at point of time, which is used to work upon in a manner to keep other branches unaffected.
Master branch contains the main code for your Project
GitHub
A site designed to facilitate collaboration with Git repositories and it’s free to use.
Sign up for a GitHub account Here.
Now for all purposes of managing a local repository, I recommend you start with Github Desktop which provides a neat GUI to interact with GitHub and has a set of neat tutorials to get you started.
Setting up Github via Command Line
This is a fairly advanced topics to share amongst complete beginners and is skipped over for a later post in the series. (Or an update)
This Blog post might feel a little incomplete-that is because it’s been created in a way to force you to explore the Software. Git is a software to be used and explored, hence that part is left out as an intensive excercise to the reader.
That being said, if you have any doubt: Do leave a comment below and we’d be happy to help resolve it.
Subscribe to my weekly-ish [Newsletter](https://tinyletter.com/sanyambhutani/) for a set of curated Deep Learning reads
Comments